
Today, I’ll show you how to make just about anything you can imagine with hypertufa using inexpensive materials you can buy from your closest home center. I’ll also show you all of the many ways you can use this versatile material to achieve various different textures and finishes without much effort.
What is Hypertufa?
Tufa is a porous natural lightweight type of rock and hypertufa is simply man-made tufa stone made from a specific recipe of cement and other ingredients.
Everyone from professional landscapers to D.I.Y. garden project lovers have been using hypertufa for years to make just about anything they can conjure up. The most popular items people make from hypertufa include the following:
- Planter pots
- Sculpture/Garden art
- Millstones/Grindstones
- Fountains
- Stone water troughs
- Natural looking stones or boulders
- Garden spheres
- Japanese stone lanterns
- Stepping stones
- Bird baths
What Makes Hypertufa so Versatile?
Hypertufa is a “dry” mix, not using much water. This means you can form it with your hands somewhat like clay and it will keep it’s shape. You can also pack it into a mold (instead of pouring the mix, like you would with cement.
Hypertufa is also about 2/3 the weight of concrete without compromising any of the strength of concrete when allowed to cure properly.
The finish or outside texture of your hypertufa project can be smooth like finished concrete or rough like stone and even porous looking like pumice/lava stone. It can also be made to look like weathered ancient stone artifacts.
These are the main reasons why hypertufa is often preferred over traditional cement mixes. Mostly, though, you can see why it is preferred just by looking at the finished product.
Hypertufa Vs. Cement and Concrete Products
A hypertufa mix is preferred when you desire a lighter weight material than concrete, also for more of an aged and ornamental looking finish.
You would need to use concrete mix instead when safety is involved, like with benches, tall fountains and pedestal bird baths where children might climb on them. Hypertufa objects are fine for ornamental use, but when safety is involved, you should use concrete instead.
How to Make Hypertufa
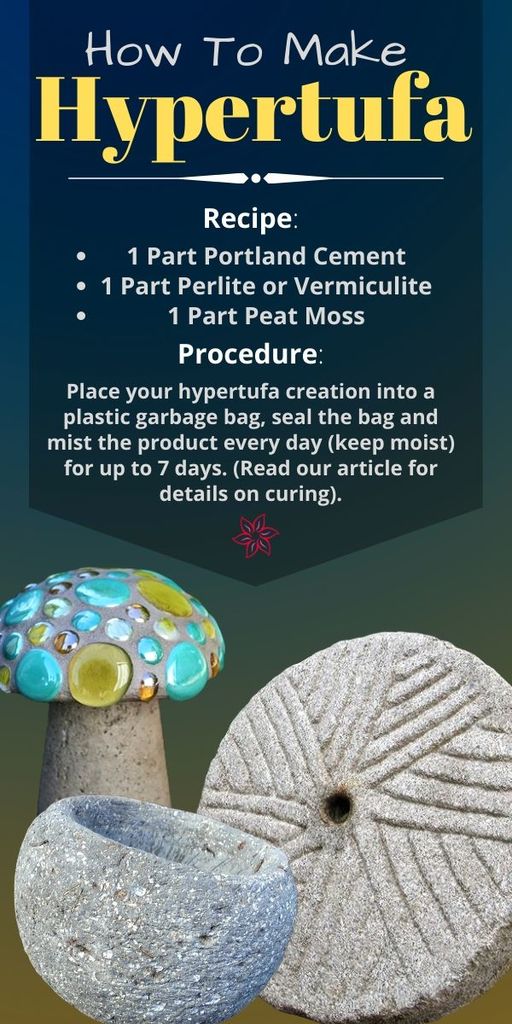
Hypertufa is made by mixing water with equal parts plain Portland cement, peat moss, and either perlite or vermiculite.
First, make sure the Portland cement has been kept in a dry environment free from moisture and high humidity. Any unused cement should be placed in a plastic lawn and leaf type of bag and sealed for next use.
As for the peat moss, you want to pre-moisten it in a bucket or a container. It should not be dripping wet or sitting in water but just enough to get it wet. This keeps the peat moss from leaching water from the cement when you mix them together so that it doesn’t dry out too fast, making your object brittle. Just remember… cement dry, peat moss moist.
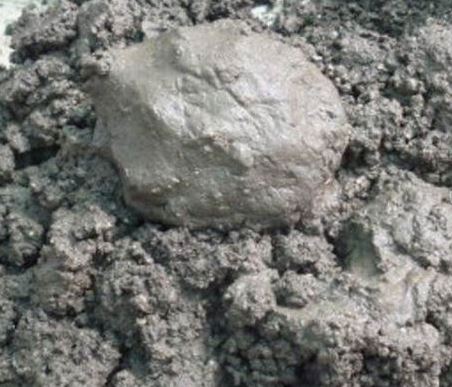
Mix your ingredients before adding water. You want to slowly add just enough water to make it a “packable” consistency. You should be able to make a ball in your hands and it will stay together. If you can squeeze out excess water, then you added too much water. If your mix is too wet, add more dry ingredients until you reach the desired consistency.
Be sure to read about the curing process below as this step is very important.
Making and Using Molds
You don’t have to use a mold as the mix will keep almost any shape you give it. Hypertufa can be packed together, shaped and molded with tools much like sand castles at the beach. After curing you can use wood rasps, chisels, etc to shape your objects since hypertufa has no pebbles or sand in it.
Using a mold can be easier and give a smooth texture to the finished product. If a smoother texture is not desired (whether using a mold or not), you can take a steel wire brush and scour the outside surface to achieve a textured or weathered rock look (see curing process for more on this).
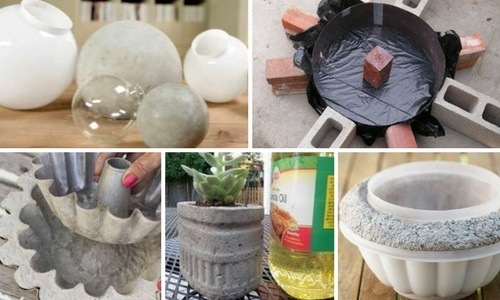
Almost anything can be used for a mold. I’ll give you some examples:
- For pots and planters use cardboard boxes (duct tape the seams), plastic bins and containers, waste paper baskets. The key is to find one shape that can fit into another.
- For stepping stones use cake pans.
- For garden spheres use inexpensive glass globe light fixtures from the hardware store or craft store Christmas tree ornaments.
- For rocks use your hands to form the desired shape.
- For stone water troughs use plywood forms. Spray the interior with a rubber coating sealer like flex-seal or rustoleum sealer.
- For millstones use a brick in the center and some plastic roof flashing or garden bed edging to make the circle (see image below)
![]()
Cement will not bond with metal, plastic, rubber, or glass. For other materials you might need a release agent. Spray on sealers are easy to use for this purpose. Peal or brush off any remaining cardboard after curing if using for your forms.
The Curing and Drying Process
For best results with hypertufa mix, the curing process is very important. If your object is not cured correctly then the resulting product could be brittle and not as strong as it should be.
After your object has cured for 24 hours, take your object out of the bag and mist it with water using a spray bottle (remove from it’s mold if using one), then replace in the bag and re-seal it. If you will be scouring the outer surface of your object with a steel brush, then this is when you will do that (before replacing your object into the bag).
Keeping the hypertufa mix wet allows a stronger chemical bond to form between the Portland cement and other ingredients. Cement curing is not just a “drying” process but a chemical reaction that keeps occurring for a few days as long as the mix is kept wet. When it dries out, the process stops and cannot gain any further strength after that.
So wait a minimum of 1 week before removing from it’s sealed bag and then it’s ready for use!
Upgrade The Look Of Your Hypertufa Creation
Add colored concrete pigments and stains according to their package instructions. Broken pieces of glass or porcelain placed on the outside of molds or pushed into the surface after forming give a nice mosaic effect. Also try glass beads or colorful aquarium rocks added directly to the mix. Silicon carbide grains can be found online and is used to add sparkles to stucco, you don’t add directly to the mix, instead you dust the surface of your object with them after forming or removing from the mold.
If you’re using a mold and making a larger object, try lining the interior surface of the mold with something plastic or rubber that has a unique texture like bubble wrap or shower caps.
My experience with hypertufa
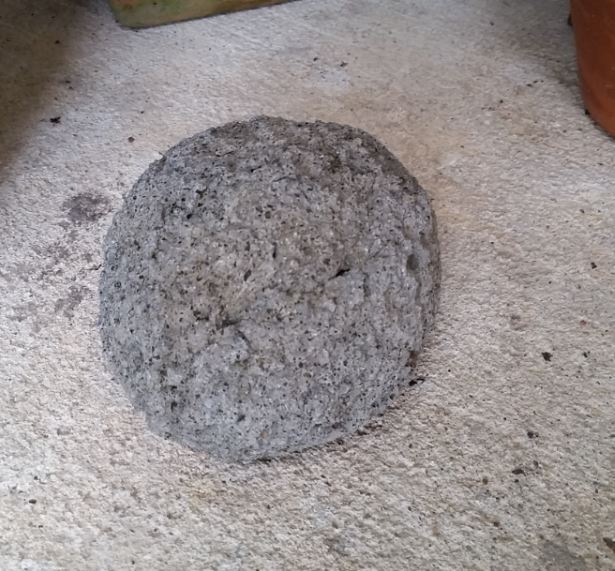 About 5 years ago I wanted to make an artificial rock waterfall in my back yard and went online looking for a solution that I could make myself. I procrastinated and didn’t make the waterfall, but I did make my first hypertufa object so I could test the material’s durability. The object I made was a simple round river rock that I gave a porous texture (using the steel brush method).
After it was cured for 4 weeks (two weeks inside a sealed bag, then air-cured for the remaining 2 weeks), I took the rock out on the driveway and dropped it from a height of 5 feet above the driveway. I was surprised to see that it did not break at all! Not even a flake came off. I even tried twice.
I’ve left the rock outside in the elements all this time and it looks even better with the weathering. It’s still very strong and shows no sign of wear, so I can assure you that this material will last for years in your landscape also.
More Ideas with Hypertufa
I wish I could share all of the fantastic ideas and uses for hypertufa in landscaping but I’m afraid that would be beyond the scope of a single article… It would be more suited to an entire e-book. I may have found one of the best out there going into much more depth than this article with ideas like how to make giant cement leaves for fountains and bird baths. Read more about it here.
I also have more ideas and images on hypertufa garden objects on my hypertufa board on Pinterest, plus many other ideas in small space gardening and landscape design. Please follow me!
Thanks for reading and good luck with your projects everyone!
PIN ME!!!