
This is an easy, one pallet forklift pallet potting bench tutorial. It has a large 2×4 foot work area and a nifty top shelf for more storage, plants and decorations. I also included an even easier no sawing pallet potting bench idea at the end of this article.
What I Used
Materials:
- One 3×4’ forklift pallet in reasonably good condition.
- Two 8’ pressure treated 2×4’s.
- One 6’ 1×4.
- 2 ½” galvanized #10 wood/decking screws.
- Paint/stain.
You can often find forklift pallets for free at big box retailers and construction sites. Always be sure to ask first because they usually reuse their pallets. Simply taking one without asking could be considered and likely is theft.
I have asked at many home centers and construction sites if I can buy or have one. They usually either offer it to me for free or charge $10 for one. Even at $10, it’s still a good deal.
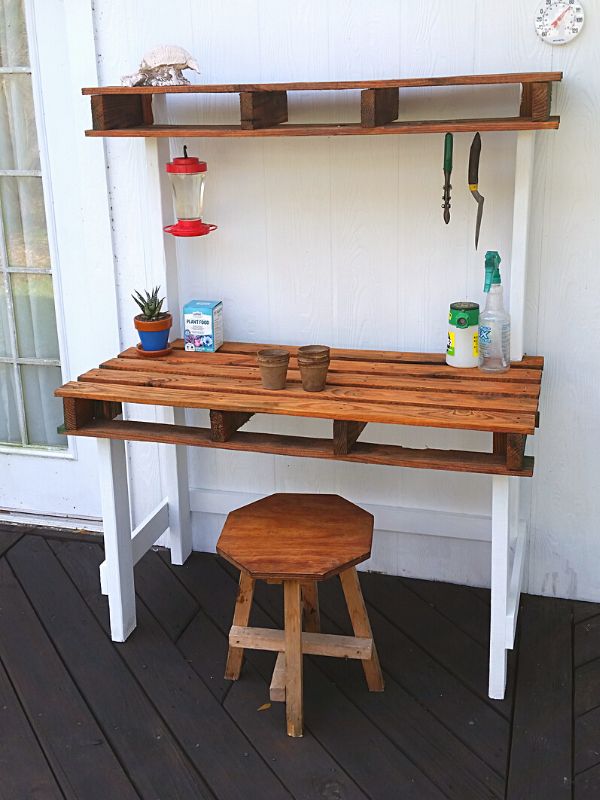
Potting Bench When Completed
Tools:
- Circular saw or hand saw
- Electric drill & screwdriver
- Paintbrush (optional)
- Sander (optional)
The Dimensions For The Lumber
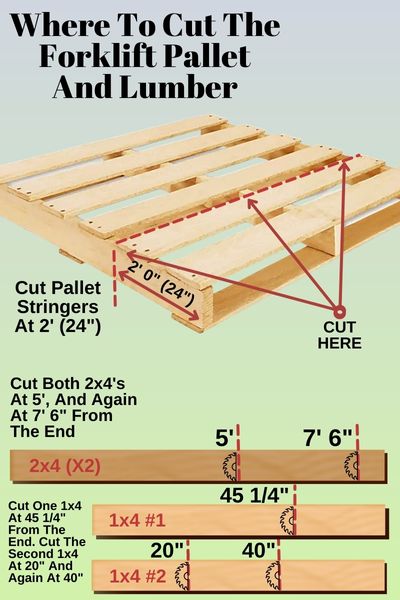
Most forklift pallets have 3 “stringers”, which are the 2×4’s that the deck boards are nailed to. I cut all the stringers 2 feet from the ends. This gave me a generous 2×4’ workspace plus a 1’ deep top shelf.
Next I cut two 2×4’s at 5’ and 7’ 6” from the ends. Both 5’ lengths will be the back uprights. This leaves two six inch pieces (these will be scrap) and two 2’ 6” lengths which will be the front uprights. (see the next image below)
For two 1×4’s, I measured and cut the first one at 45 ¼”. This piece is the lower back brace, the remainder is scrap. I cut the second 1×4 at 20” and 40” from the end. The first two 20” pieces will be the lower side braces.
Assembly Instructions
I hope the following diagram helps illustrate how I put the whole potting bench together with pallet shelves, 2×4 uprights, and the 1×4 bottom bracing.
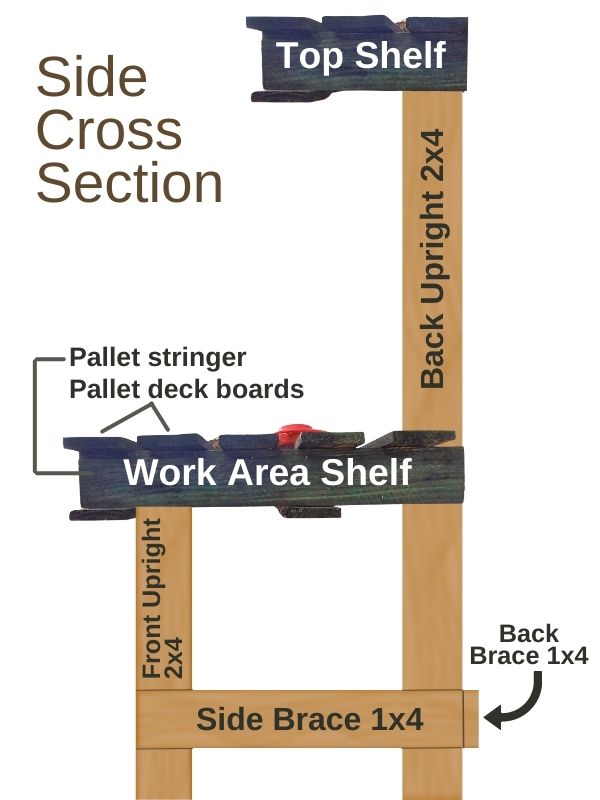
It’s really pretty simple. I used two 2 ½” galvanized #10 wood/decking screws at all the junctions.
One more thing to mention. I had to cut a notch in one of the pallet deck boards to accommodate the back uprights. (see image below). If you don’t have a skill saw for this, a hacksaw will work. I forgot to mention that in the tools list.
Finishes
After assembly I sanded the top deck boards on the workspace shelf with a rotary sander. I didn’t sand the bottom boards.
I highly suggest not skipping this step since pallet deck boards are rough cut, sanding them makes a much more enjoyable work surface.

I stained both pieces of the pallet, then painted the uprights and bracing white to match the house. This is optional of course. There’s nothing wrong with an unfinished rustic look.
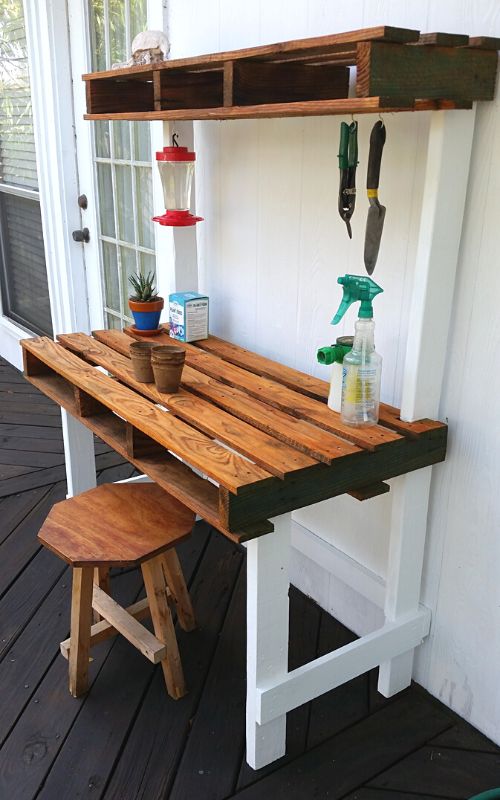
I added hooks to the top shelf to hang my most used garden hand tools. The space in between the pallet deck boards also turned out to be a useful spot to store seed trays.
I designed this potting bench to be at average countertop height (2 feet 6 inches or 30 inches). You may desire a higher or lower workspace for your potting bench. All you would need to do is cut the front uprights (the 2’ 6” pieces) to your desired height and adjust the work shelf to that height.
Idea #2: An Easy, No Sawing Pallet Potting Bench
This is also a space saver because it can fold up and out of the way when not in use. All you need are 2 pallets and some hardware.
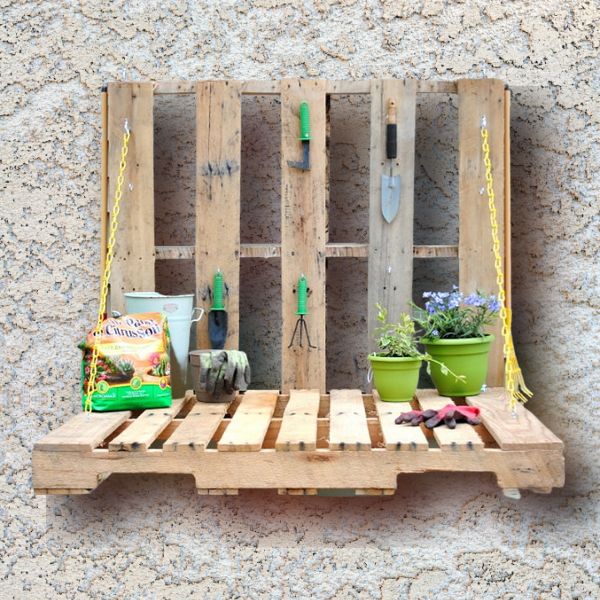
It may be necessary to put in 2 fence posts between the pallet and the wall so you have something besides your house to screw it into.
You Will Need:
- Two forklift pallets
- Hardware chain
- 4 large screw hooks
- 2 or 3 fence or door hinges
- 2 in. Gate Hook and Eye (to keep it closed when not in use)
- Paint and stain (optional)