Making Christmas themed painted rocks can be a fun project with family or something you create to give to loved ones. Some people may be asking, what can you do with these painted Christmas stones once they are made?
I like to place them outside among the river rocks in my landscape borders during the holidays. You can also use them for indoor decorations like on the mantle, amongst presents under the tree or a number of other ways.

Easy Christmas Rock Art Ideas For Beginners
Using simple designs can be a good starting point. This way you can paint a base color on your rocks (if desired) with a medium paint brush, and then hand draw your design with a paint pen after the base coat dries.
Starting with an outline of your design can also be helpful. Use a pencil or a permanent marker with a fine point.
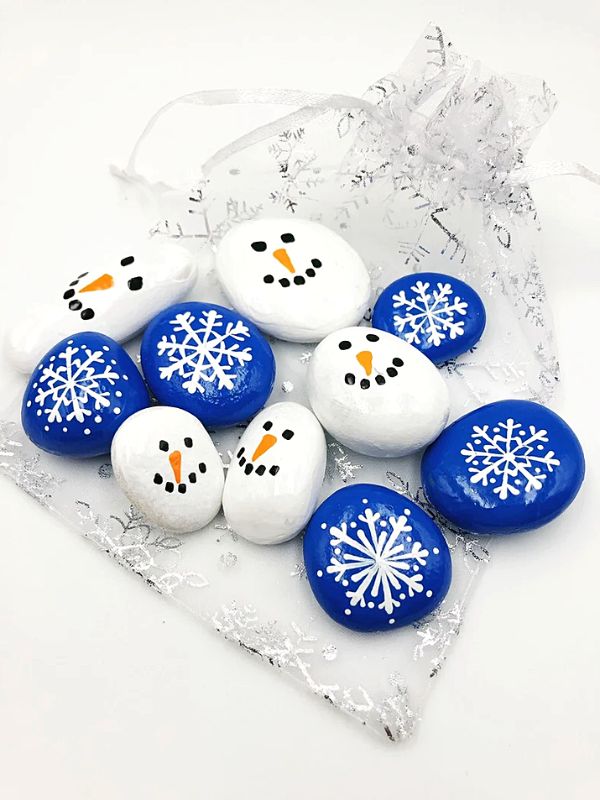
Snowflakes and Snowmen painted rocks
25 Christmas Themed Rock Painting Ideas
- Gingerbread men
- Candy canes
- Christmas trees
- Three wise men
- Starlight mints
- A snowy Christmas village
- Wreaths
- Rudolph and other reindeer
- A North pole sign/Santa’s workshop
- Mistletoe
- Christmas presents
- Elf on a shelf
- Outdoor winter scenes
- Family first names or last name
- Frosty the snowman
- Snowflakes
- A nutcracker
- Santa’s elves
- Christmas bells
- The Nativity scene
- Snow Globes
- Angels
- Strand of old-fashioned Christmas lights
- Seasonal sayings
- Poinsettia blooms

Preparing Rocks For Painting
Rock painting is always easier if you have the right stone. Round stones with a semi flat surface and a smooth texture are ideal. They should be around 1 ½ to 2 ½ inches in diameter.
I use the Mexican beach pebbles from the home center because they are the perfect size, shape, and texture. They are typically around $14 for a 0.4 cubic foot square bag so you get quite a few pebbles to work with.
Some river rocks have the right shape and texture but tend to contain more broken rocks compared to the beach pebbles.
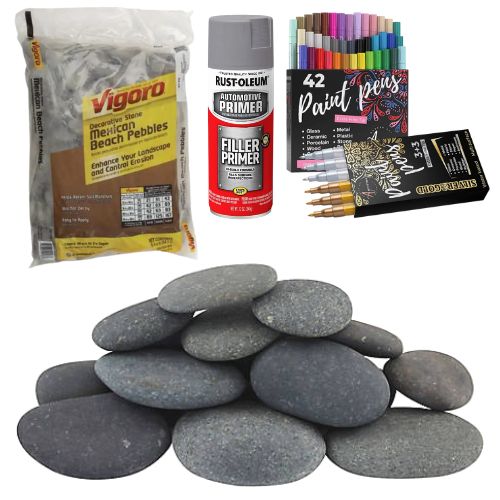
Rock painting tools I use
Cleaning is necessary to remove any dirt and debris and to ensure the best paint adhesion. I simply run my rocks under the kitchen faucet and run a scouring pad all around the surface. This always reminds me of cleaning potatoes to make baked potatoes.
Allow the rocks to dry completely.
Priming And Painting
Once your rocks are clean you can apply a base coat. This is optional and you can use acrylic paint or primer. This helps fill in any tiny holes that may be on the surface which can make painting the details later go on smoother.
If using a base coat or primer, allow it to dry before applying more paint. Acrylic paints made for outdoor projects hold up best. Patio paints are popular in rock painting.
Small round and fan paint brushes are good for covering large areas fast. Finer details are created with paint pens.
Now you can seal your holiday creations (and I highly recommend this step) with a clear sealer. I use a glossy clear coat spray.
Find a flat outdoor surface and lay down newspaper, cardboard, or whatever you can find to place your rocks on. Apply the spray sealer to all of the rocks one side at a time. I give each side 3-4 coats.
You May Also Enjoy…
Painted Rock Ideas For The Garden