
Microgreens have become one of the most popular entry points into home growing. They’re fast, they’re forgiving, and they give beginners the kind of quick wins that make you want to keep going.
But not all microgreens are created equal. Some take three weeks or more to reach harvest size, which may not be ideal for everyone. The seven varieties in this guide were chosen specifically because they combine three things: fast germination, reliable growth, and a wide margin for beginner error.
A beginner-friendly microgreen, for our purposes, means one that germinates quickly and consistently, reaches harvest size in under two weeks, doesn’t require soaking (with a couple of noted exceptions), resists mold better than fussier varieties, and tastes good enough that you’ll actually want to eat what you grow.
Let’s get into it.

The 7 Best Microgreens for Beginners
1. Radish
Days to harvest: 7–10 days
If there’s one microgreen that belongs at the top of every beginner list, it’s radish. It germinates in as little as two to three days, grows fast and vigorously, and produces a consistent crop with minimal fuss. The seeds are large enough to handle and spread easily, even if you’ve never grown anything before.
Radish microgreens have a lightly spicy, peppery flavor — similar to the root vegetable but brighter and fresher. They’re excellent on tacos, grain bowls, salads, and sandwiches, and the pop of flavor they add to simple dishes is genuinely impressive for something grown in a tray on your kitchen counter.
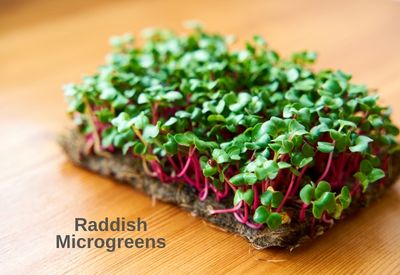
Growing tip: Bottom water throughout the growing cycle rather than watering from the top. Radish foliage is prone to staying wet if misted, which invites mold and shortens shelf life after harvest. Keep the tray covered during the blackout period and unstack once seedlings are about an inch tall.
Common mistake to avoid: Watering too close to harvest time. Stop watering at least 12 hours before you cut to ensure the greens are dry. Harvesting wet radish microgreens will dramatically reduce how long they last in the fridge.
2. Sunflower
Days to harvest: 10–14 days
Sunflower microgreens are one of the most satisfying crops a beginner can grow. The seeds are large and easy to handle, germination is fast and reliable, and the final crop is thick, crunchy, and substantial in a way that most other microgreens aren’t.
They have a mild, slightly nutty flavor that works beautifully in salads, wraps, and smoothies.
They do take a bit longer than some of the other varieties on this list — expect to wait up to 14 days — but the yield is generous and well worth it. One tray can produce a surprisingly large harvest.
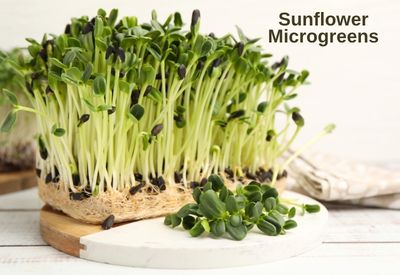
Growing tip: Soak your sunflower seeds for 6–8 hours before sowing. The shells are thick and soaking jumpstarts germination significantly. After sowing, press the seeds firmly into the growing medium and keep them covered with a blackout dome or inverted tray weighted down. This helps the seeds shed their hulls as they push up through the medium.
Common mistake to avoid: Harvesting too late. Once sunflower microgreens go past the cotyledon stage and true leaves begin to develop, the flavor turns bitter quickly. Harvest when the seed leaves are fully open and most of the shells have dropped off.
3. Pea Shoots
Days to harvest: 8–12 days
Pea shoots have a fresh, sweet flavor that’s genuinely delicious — they taste like the essence of a garden pea, tender and bright. They’re one of the highest-yielding microgreens by weight, which means one tray goes a long way.
They’re also one of the few varieties that can sometimes give you a second and even third harvest from the same tray.
Pea shoots are excellent raw in salads or as a garnish, but they also hold up well lightly sautéed or tossed into stir fries at the last minute.
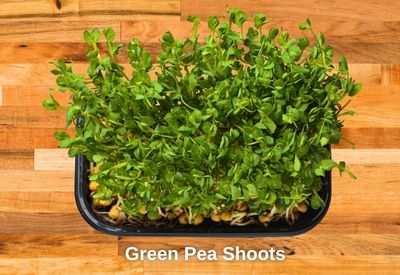
Growing tip: Soak your pea seeds overnight (12–24 hours) before sowing — they have a dense outer coat and soaking gives germination a meaningful head start. Once sowed, keep the tray stacked and weighted for the first few days to encourage strong rooting. Pea roots have a tendency to lift the seeds out of the medium, so a weighted cover helps anchor them early.
Common mistake to avoid: Underwatering. Peas use quite a bit of water as they grow and put on a lot of leaf quickly. Check the moisture level daily and don’t let the tray dry out completely between waterings.
4. Broccoli
Days to harvest: 7–10 days
Broccoli microgreens are a staple for good reason. They grow fast, germinate reliably, and are widely regarded as one of the most beginner-friendly varieties available. The flavor is mild and slightly earthy — much more approachable than mature broccoli — which makes them easy to add to almost anything without overwhelming the dish.
They’re also incredibly nutritious, which is part of why they’ve become so popular among health-conscious growers. Broccoli microgreens are rich in vitamins C and K and contain high levels of sulforaphane, a compound with well-documented antioxidant properties.
Growing tip: No soaking required — broccoli seeds can go straight onto the growing medium. Sow them a little more densely than other varieties since the seeds are small and the plants tend to grow upright without crowding each other out. Make sure you have good airflow around the tray, as broccoli can be prone to damping off if conditions are too humid.
Common mistake to avoid: Overwatering during germination. Keep the medium moist but not soggy, especially in the first few days. Once the seedlings are under light, switch to bottom watering to keep the foliage dry.
5. Mustard
Days to harvest: 7–10 days
Mustard microgreens are one of the fastest and most forgiving crops on this list. Germination rates are consistently high, growth is vigorous, and the plants are tough enough to bounce back from minor beginner mistakes like slightly inconsistent watering. They’re a great confidence builder for first-time growers.
Flavor-wise, mustard packs a real punch — bold, peppery, and a little spicy. A small amount goes a long way. Think of it less as a base green and more as a flavor accent: a pinch on avocado toast, a scatter over ramen, or a finishing touch on roasted vegetables.
Growing tip: No soaking needed. Like broccoli, mustard seeds go straight onto the medium. Mustard is a brassica, so it follows the same general growing pattern: blackout period, then move to light. Keep good airflow around the tray to prevent any moisture buildup on the foliage.
Common mistake to avoid: Harvesting too late. Mustard microgreens are at their best during the cotyledon stage. Once true leaves start developing, the flavor intensifies significantly and can become quite sharp. Harvest on the earlier side if you prefer a milder heat.
6. Wheatgrass
Days to harvest: 7–10 days
Wheatgrass is a bit of an outlier on this list — you won’t be tossing it into a salad alongside the others. It’s grown primarily for juicing and blending into smoothies, and it has a distinct grassy, mildly sweet flavor that’s quite different from the other varieties here.
But it earns its place on any beginner list because it’s genuinely easy to grow, fast, and incredibly rewarding if you’re interested in adding fresh juice to your routine.
Wheatgrass is harvested when the blades reach about 6–7 inches tall, which typically coincides with the jointing stage — when you can see the leaf beginning to split near the base. At this point the nutritional content is at its peak.
Growing tip: Soak your wheat seeds for 8–12 hours before planting to soften the hull and speed up germination. After sowing, cover and keep in blackout for 2–3 days. Wheatgrass is particularly prone to mold, so prioritize good airflow and avoid overwatering. Coco coir is often recommended over soil for this variety as it holds moisture more evenly without keeping seeds waterlogged.
Common mistake to avoid: Waiting too long to harvest. The older wheatgrass gets past the jointing stage, the more bitter and fibrous it becomes. Harvest sooner rather than later for the best flavor in your juice.
7. Mizuna
Days to harvest: 7–14 days
Mizuna is a Japanese mustard green that doesn’t get nearly enough attention in the beginner microgreens conversation. It’s fast, reliable, and produces distinctive feathery leaves that look beautiful on a plate — which matters if you’re growing for visual presentation as much as flavor.
The flavor is milder than most other mustard-family greens — a gentle peppery zing without any sharp heat. It’s versatile enough to use as a base green in salads, a garnish for soups and grain bowls, or even a topping for pizza.
Germination is fast (as little as 3–5 days) and the seeds are tiny, so a little goes a long way when seeding.
Growing tip: No soaking needed. Mizuna does best in cooler conditions — aim for around 60–70°F if you can. Keep the blackout period to 3–4 days and then move to light. The feathery true leaves develop quickly, so check your tray daily once it’s under light.
Harvest at the cotyledon stage for the mildest, most tender result; letting it grow to the true leaf stage gives a slightly more assertive flavor.
Common mistake to avoid: Overcrowding. Mizuna seeds are very small and it’s easy to sow too thickly. A dense tray with poor airflow is an invitation for mold. Aim for even distribution rather than maximum coverage.
What to Look for in Beginner-Friendly Microgreen Seeds
Once you’ve grown a tray or two and caught the bug, you’ll probably want to experiment beyond this list. Here’s what to evaluate when choosing a new variety:
- Germination rate: A variety with consistently high germination means fewer gaps in your tray and more predictable yields. Look for seeds marketed specifically for microgreens or sprouting, as these are usually tested and selected for germination performance.
- Days to harvest: Anything in the 7–14 day range is beginner-appropriate. Varieties that take 3 weeks or more (like basil or fennel) are better saved for once you’re comfortable with the basics.
- Seed availability and cost: The varieties on this list are widely available from reputable microgreen seed suppliers. Always buy seeds labeled for microgreen or sprouting use — they’re tested for contamination in ways that standard garden seeds aren’t.
- Mold resistance: Some varieties (like basil and wheatgrass) are more prone to mold than others. If you’re still dialing in your growing environment, stick with hardier varieties like radish, broccoli, and mustard until you’ve got airflow and watering under control.
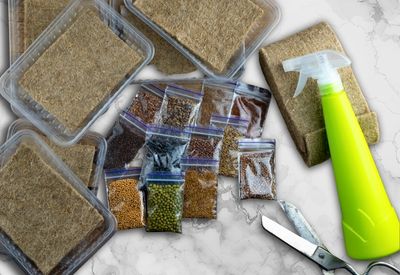
Quick-Start Tips for Your First Tray
You don’t need a lot of equipment to get started — but a few basic decisions will make a real difference in your results.
- Growing medium: A quality potting mix or coco coir both work well. Coco coir is a popular choice because it holds moisture evenly, resists mold better than some soils, and is clean to work with. Whatever you use, make sure it’s thoroughly moistened before you sow your seeds.
- Light: A sunny south-facing window can work for many varieties, but a basic LED grow light gives you much more consistent results year-round. Aim for 12–16 hours of light per day once your trays are out of the blackout period.
- Watering: Bottom watering is the single most impactful habit you can develop as a microgreen grower. Set your grow tray inside a second tray without holes, add a small amount of water, and let the medium absorb from the bottom up. This keeps the foliage dry and dramatically reduces mold risk.
- When to harvest: The general rule is to harvest just before or as the first true leaves begin to appear, when the cotyledons (the first seed leaves) are fully open. Don’t go by the calendar alone — watch the plants. Harvest in the morning when the greens are crisp and well-hydrated, and don’t water the day before if you can help it.
Frequently Asked Questions
Which microgreen grows the fastest?
Radish is the speed champion among beginner varieties — it can be ready to harvest in as few as 7 days under good conditions. Mustard and broccoli are close behind, both reliably hitting the 7–10 day window.
Do I need special equipment to grow microgreens?
Not much. You’ll need a shallow growing tray (a second tray for bottom watering is helpful), a growing medium like potting mix or coco coir, seeds, and a light source. A basic LED grow light is worth the investment if you plan to grow year-round, but a bright south-facing window will get you started. That’s genuinely all you need for your first tray.
Can I reuse the growing medium or tray after harvest?
The growing medium is spent after one crop of microgreens — the root mat left behind doesn’t make for a great second grow. Compost it and start fresh. Your trays, however, can be reused indefinitely — just rinse and sanitize them between crops to prevent any buildup of mold or bacteria.
How do I store microgreens after harvest?
Harvest dry, store dry. After cutting, let your microgreens air dry fully before placing them in a container in the fridge. Use a container with some ventilation — avoid fully airtight seals, as trapped moisture will cause them to deteriorate quickly. Most varieties will stay fresh for 5–7 days under proper storage conditions.

Ready to Grow? Start With One Tray
The best thing about the varieties on this list is that none of them require a perfect setup, years of experience, or a green thumb. They’re genuinely forgiving crops that reward consistent basic care: moist medium, good light, bottom watering, and a watchful eye as harvest approaches.
If you’re brand new to microgreens, pick one variety and start there. Radish is the classic first choice for good reason — it’s fast, reliable, and gives you a harvest in about a week.
Once you’ve got one successful tray under your belt, you’ll have a much better feel for your growing environment and you can start experimenting with the others.
Succession planting — starting a new tray every week or two — is the move once you’re comfortable. It keeps fresh greens on your counter continuously and is one of the most satisfying rhythms you can develop as a home grower.
Start small, grow often, and enjoy the harvest.