
Hypertufa planters are popular with gardeners because they are lightweight, durable, and beautifully rustic. The best part is that you can probably find molds in your kitchen, garage, or recycling bin.
The creativity you can find reusing everyday items is boundless. There are many different and unique shapes that hypertufa can be molded into. You can make a collection of planters or simple stepping stones for the garden.
This guide will show you 15 brilliant hypertufa mold ideas using common household items, plus pro tips to help your molds release cleanly every time.
What Makes a Good Hypertufa Mold?
Before diving into the ideas, it helps to understand what works best.
A good hypertufa mold should be:
- Non-stick or easy to release
- Strong enough to hold wet hypertufa
- Slightly flexible (plastic works great)
- Deep enough for plant roots
- Easy to remove after curing
You’ll also need two molds for most projects:
- Outer mold: Creates the outside shape
- Inner mold: Creates the planting cavity
The space between them becomes the walls of your planter.
15 Genius Hypertufa Mold Ideas Using Household Items
1. Plastic Food Storage Containers
Plastic food containers are one of the best hypertufa molds, especially for beginners.
They’re sturdy, reusable, and available in many shapes and sizes.
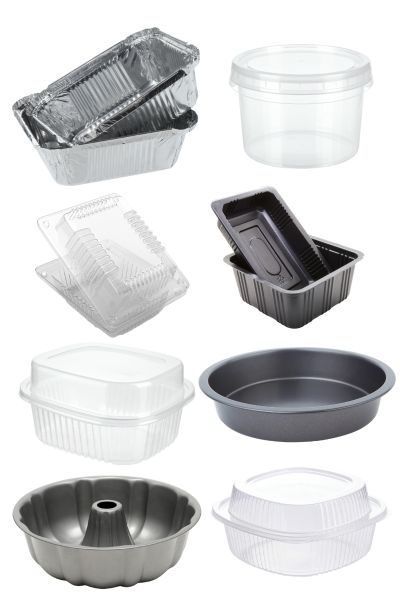
Household items used as hypertufa mold ideas
Best for:
- Rectangular planters
- Modern designs
- Medium-sized containers
Tip: Use a smaller container inside to create the cavity.
Difficulty: Easy
2. Mixing Bowls
Mixing bowls create smooth, round hypertufa planters that look professional and elegant.
Plastic bowls work best because they flex slightly for easy removal.
Best for:
- Round planters
- Decorative containers
- Medium to large pots
Tip: Use two bowls of different sizes.
Difficulty: Easy
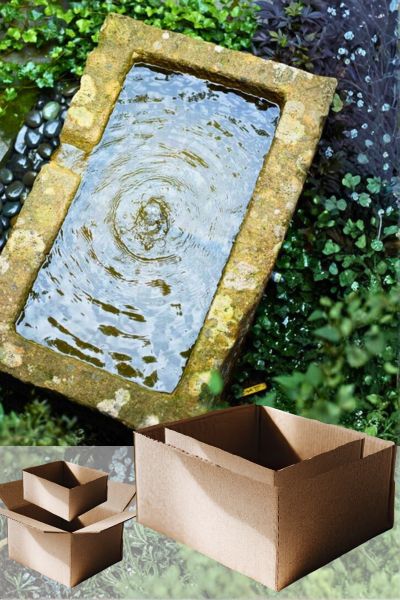
3. Cardboard Boxes
Cardboard boxes are perfect for square or rectangular hypertufa planters.
They’re free, customizable, and easy to cut to any size.
Best for:
- Modern square planters
- “Stone” water trough planters and fountains
- Large containers
- Custom dimensions
Tip: Line the inside with a plastic bag to prevent sticking.
4. Plastic Nursery Pots
Old nursery pots make excellent molds and are ideal for beginners.
Their tapered shape makes hypertufa containers easier to remove.
Best for:
- Classic planter shapes
- Recreating standard pot designs
- Multiple containers
Tip: Stack 2 pots tightly together to make a sturdier mold.
Difficulty: Easy
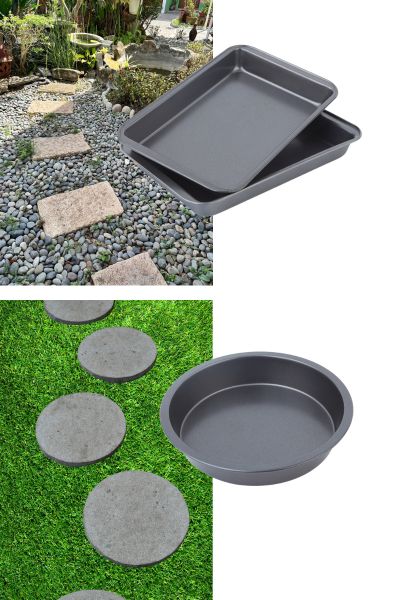
5. Old Baking Pans
Unused loaf pans, cake pans, and baking trays make fantastic hypertufa molds.
They create clean edges and unique shapes.
Best for:
- Garden stepping stones
- Decorative containers
- Rectangular planters
- Unique designs
Tip: For a decorative inlay, place a large leaf in the middle of the pan. The impression will be visible on the top of the stepping stone.
Difficulty: Easy
6. Yogurt Containers and Food Packaging
These are perfect for small hypertufa projects and succulent containers.
They’re free and easy to find.
Best for:
- Small pots
- Succulent planters
- Mini hypertufa containers
Tip: Cut them to create custom heights.
Difficulty: Easy
7. 5-Gallon Buckets
Buckets are perfect for making large hypertufa planters.
They’re strong enough to support heavy mixes and create thick walls.
Best for:
- Large planters
- Outdoor statement pieces
- Patio containers
Tip: Use a smaller bucket inside.
Difficulty: Beginner
8. Dollar Store Plastic Bowls
Cheap plastic bowls work extremely well as molds.
They’re flexible and easy to release.
Best for:
- Round planters
- Beginner projects
- Experimenting with sizes
Tip: Buy multiple sizes for variety.
Difficulty: Easy
9. Takeout Containers
Takeout containers create modern, clean planter shapes.
They’re lightweight and disposable.
Best for:
- Small herb planters
- Window sill containers
- Modern designs
10. Silicone Baking Molds
Silicone molds release hypertufa effortlessly.
They’re perfect for decorative containers.
Best for:
- Decorative planters
- Detailed designs
- Small containers
Tip: No release agent needed.
Difficulty: Easy
11. Storage Bins and Totes
Plastic storage bins allow you to make large trough-style planters.
These look amazing in gardens.
Best for:
- Large trough planters
- Raised garden containers
- Statement pieces
Pro tip: Perfect for outdoor landscapes.
Difficulty: Beginner
12. Disposable Cups
Plastic cups are perfect for small hypertufa pots.
They’re extremely beginner-friendly.
Best for:
- Succulents
- Small plants
- The “stem” part of hypertufa mushrooms. The head or top of the mushroom is typically made from a plastic bowl.
Difficulty: Easy
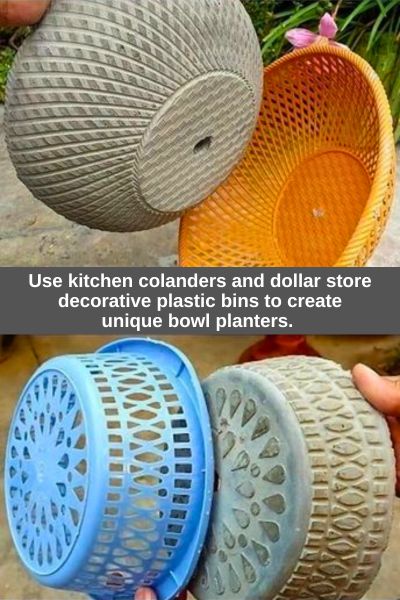
13. Kitchen Colanders
Colanders create unique textures and even provide natural drainage holes.
Best for:
- Rustic planters
- Decorative containers
- Unique designs
Tip: Line with plastic if holes are too large.
Difficulty: Beginner
14. Plastic Storage Containers
Larger storage containers create durable, professional-looking hypertufa planters. These are those containers like the ones that people use to keep cereal and cookies in their pantry.
Best for:
- Medium to large containers
- Rectangular planters
- Garden installations
Tip: Thick plastic works best.
Difficulty: Easy
15. Glass Bowls (Use Carefully)
Glass bowls can create smooth, beautiful hypertufa shapes.
However, they must be used with care.
Best for:
- Decorative containers
- When a more smooth finish is desired
Safety tips: Use utility gloves and eye protection when taking your hypertufa project out of a glass mold. Also, use a release agent like cooking spray to avoid excessive pressure when removing from the mold.
Difficulty: Intermediate
Pro Tips for Easy Mold Release
These tips make a huge difference in success:
Use a release agent such as:
- Cooking spray
- Petroleum jelly
- Plastic wrap
- Garbage bags
Also:
- Let hypertufa firm up before removing molds
- Don’t remove molds too early
- Flex plastic molds gently
- Be patient during curing
Mold Combinations That Work Best for Beginners
These combinations are nearly foolproof:
- Bowl inside bowl = classic planter
- Bucket inside bucket = large planter
- Box inside box = modern square planter
- Cup inside cup = mini pots
These methods create consistent wall thickness and professional results.
Household Items to Avoid Using as Hypertufa Molds
Avoid these materials:
- Thin glass
- Paper without plastic lining
- Porous wood
- Fragile containers
These can stick, break, or ruin your project.
Why Household Items Make the Best Hypertufa Molds
Using household items and cheap plastic from the dollar store saves money and allows unlimited creativity.
Benefits include:
- Free or inexpensive
- Easy to find
- Reusable
- Available in countless shapes
- Perfect for beginners
Many experienced hypertufa gardeners prefer household molds over store-bought options.
Final Thoughts
You don’t need expensive tools or special molds to create beautiful hypertufa planters. Some of the best molds are already in your home.
Start simple with plastic containers or bowls, then experiment with larger or more creative molds as you gain confidence.
Once you make your first hypertufa planter, it quickly becomes an addictive and rewarding gardening project.